Docker Stack Outline with Keycloak
This docker compose will not be using S3 storage or Minio bucket storage. Both storage options add too much complexity and AWS S3 isn't really selfhosted. That being said you should have a backup of your data incase local storage fails. For Authentication we are going to use Keycloak for the OIDC.

A Docker stack for a selfhosted outline with local storage.
This docker compose will not be using S3 storage or Minio bucket storage. Both storage options add too much complexity and AWS S3 isn't really selfhosted. That being said you should have a backup of your data incase local storage fails. For Authentication we are going to use Keycloak for the OIDC.
Keycloak can run using its own container stack, however we are incorporating it into the docker compose stack.
Learn more about Outline from outline/outline GitHub.
Changes
- Separated network,
backendfor the postgres databases and redis containers. frontendnetwork for containers,outline-appandkeycloak-appto be exposed to internet using a proper proxy.container_nameis added to all services,outline-app,outline-redis,outline-postgres,keycloak-appandkeycloak-db. You can choose to rename for your deploy.- Changed all Docker volumes to bind-mounts for better backup.
- added a volume for redis
/data. - added keycloak as the primary auth provider.
- changed docker.env file to be local storage only.
Requirements
- A reverse proxy such as
Nginx Proxy Manager. You can grab instructions to install one here. - A domain and subdomains at the ready. I recommend
outline.domain.comandkeycloak.domain.com. You can use others but make sure you change the URLS in the compose and .env
Deployment
A) You can clone repo here.
B) Download the docker-compose.yml and docker.env file and put them into a folder to run.
C) Copy the following into your own docker-compose.yml and the docker.env to your own files and folder.
The docker compose, to download go here
version: "3.2"

networks:
  frontend:
    external: true
  backend:

services:
  outline:
    container_name: outline-app
    image: docker.getoutline.com/outlinewiki/outline:latest
    env_file: ./docker.env
    environment:
      - PUID=1000
      - PGID=1000
    ports:
      - "3000:3000"
    volumes:
      - ./outline-data:/var/lib/outline/data
    depends_on:
      - postgres
      - redis
    networks:
      - frontend
      - backend

  redis:
    container_name: outline-redis
    image: redis
    env_file: ./docker.env
    ports:
      - "6379:6379"
    volumes:
      - ./outline-redis.conf:/redis.conf
      - ./outline-redis-data:/data
    command: ["redis-server", "/redis.conf"]
    healthcheck:
      test: ["CMD", "redis-cli", "ping"]
      interval: 10s
      timeout: 30s
      retries: 3
    networks:
      - backend

  postgres:
    container_name: outline-postgres
    image: postgres
    env_file: ./docker.env
    ports:
      - "5432:5432"
    volumes:
      - ./outline-database-data:/var/lib/postgresql/data
    healthcheck:
      test: ["CMD", "pg_isready"]
      interval: 30s
      timeout: 20s
      retries: 3
    environment:
      POSTGRES_USER: 'user'
      POSTGRES_PASSWORD: 'pass'
      POSTGRES_DB: 'outline'
    networks:
      - backend

  keycloak:
    container_name: keycloak-app
    image: quay.io/keycloak/keycloak:latest
    ports:
      - "8080:8080"
      - "8443:8443"
    environment:
      KC_DB: postgres
      KC_DB_URL: jdbc:postgresql://keycloak-db:5432/keycloakdb
      KC_DB_USERNAME: keycloakdbuser
      KC_DB_PASSWORD: #change me
      KEYCLOAK_ADMIN: 'admin'
      KEYCLOAK_ADMIN_PASSWORD: #change me to a secure password
      KC_DB_PORT: 5432
      KEYCLOAK_DATABASE_SCHEMA: public
      KEYCLOAK_ENABLE_HEALTH_ENDPOINTS: 'true'
      KEYCLOAK_ENABLE_STATISTICS: 'true'
      KC_HOSTNAME: 'keycloak.domain.com'
      KC_PROXY: edge
      KC_PROXY_ADDRESS_FORWARDING: 'true'
      KC_HTTP_ENABLED: 'true'
    depends_on:
      - key-postgres
    networks:
      - frontend
      - backend
    command: start

  key-postgres:
    image: postgres:15
    container_name: keycloak-db
    volumes:
      - ./keycloak-db:/var/lib/postgresql/data
    environment:
      POSTGRES_DB: 'keycloakdb'
      POSTGRES_USER: 'keycloakdbuser'
      POSTGRES_PASSWORD: #same as KC_DB_PASSWORD
    networks:
      - backend
    healthcheck:
      test: [ "CMD", "pg_isready", "-q", "-d", "keycloakdb", "-U", "keycloakdbuser" ]
      interval: 10s
      timeout: 5s
      retries: 3
      start_period: 60s
    restart: unless-stopped
docker.env condensed, non-condensed version with more options here
# –––––––––––––––– REQUIRED ––––––––––––––––
NODE_ENV=production
# Generate a hex-encoded 32-byte random key. You should use `openssl rand -hex 32`
# in your terminal to generate a random value.
SECRET_KEY=
# Generate a unique random key. The format is not important but you could still use
# `openssl rand -hex 32` in your terminal to produce this.
UTILS_SECRET=

DATABASE_URL=postgres://user:pass@outline-postgres:5432/outline
DATABASE_URL_TEST=postgres://user:pass@outline-postgres:5432/outline-test
DATABASE_CONNECTION_POOL_MIN=
DATABASE_CONNECTION_POOL_MAX=
PGSSLMODE=disable
REDIS_URL=redis://outline-redis:6379

URL=https://outline.domain.com
PORT=3000

FILE_STORAGE=local
FILE_STORAGE_LOCAL_ROOT_DIR=/var/lib/outline/data
FILE_STORAGE_UPLOAD_MAX_SIZE=26214400

# –––––––––––––– AUTHENTICATION ––––––––––––––

# To configure generic OIDC auth, you'll need some kind of identity provider.
# See documentation for whichever IdP you use to acquire the following info:
# Redirect URI is https://<URL>/auth/oidc.callback
OIDC_CLIENT_ID=outline
OIDC_CLIENT_SECRET=
OIDC_AUTH_URI=https://keycloak.domain.com/realms/outline/protocol/openid-connect/auth
OIDC_TOKEN_URI=https://keycloak.domain.com/realms/outline/protocol/openid-connect/token
OIDC_USERINFO_URI=https://keycloak.domain.com/realms/outline/protocol/openid-connect/userinfo

OIDC_USERNAME_CLAIM=email
OIDC_DISPLAY_NAME=KeyCloak
OIDC_SCOPES=openid profile email


# –––––––––––––––– OPTIONAL ––––––––––––––––

FORCE_HTTPS=true
ENABLE_UPDATES=false
WEB_CONCURRENCY=1
MAXIMUM_IMPORT_SIZE=5120000
# Configure lowest severity level for server logs. Should be one of
# error, warn, info, http, verbose, debug and silly
LOG_LEVEL=info

# To support sending outgoing transactional emails such as "document updated" or
# "you've been invited" you'll need to provide authentication for an SMTP server
SMTP_HOST=
SMTP_PORT=
SMTP_USERNAME=
SMTP_PASSWORD=
SMTP_FROM_EMAIL=hello@example.com
SMTP_REPLY_EMAIL=hello@example.com
SMTP_TLS_CIPHERS=
SMTP_SECURE=true

DEFAULT_LANGUAGE=en_US

RATE_LIMITER_ENABLED=true

RATE_LIMITER_REQUESTS=1000
RATE_LIMITER_DURATION_WINDOW=60

DEVELOPMENT_UNSAFE_INLINE_CSP=false
After you have cloned or nested the docker-compose.yml and docker.env into a folder. We will need to edit the two files before running them.
Change the following KC_DB_PASSWORD and KEYCLOAK_ADMIN_PASSWORD to secure passwords. Make sure they are different, you can use a terminal command openssl rand -hex 12 to generate a random password.
KC_DB_USERNAME: keycloakdbuser
KC_DB_PASSWORD: #change me
KEYCLOAK_ADMIN: 'admin'
KEYCLOAK_ADMIN_PASSWORD: #change me to a secure password
Change the POSTGRES_PASSWORD to the same password you set for KC_DB_PASSWORD.
POSTGRES_USER: 'keycloakdbuser'
POSTGRES_PASSWORD: #same as KC_DB_PASSWORD
Change OIDC_AUTH_URI, OIDC_TOKEN_URI and OIDC_USERINFO_URI to the correct domain or subdomain. leave the rest of the path alone.
OIDC_AUTH_URI=https://keycloak.domain.com/realms/outline/protocol/openid-connect/auth
OIDC_TOKEN_URI=https://keycloak.domain.com/realms/outline/protocol/openid-connect/token
OIDC_USERINFO_URI=https://keycloak.domain.com/realms/outline/protocol/openid-connect/userinfo
Change the URL to your domain to subdomain you plan to use for outline.
URL=https://outline.domain.com ##change this
PORT=3000
Connect to the keycloak container by either going to keycloak.yourdomain.com or by connecting to the port 8080 at you LAN IP for admin controls. ex. 127.0.0.1:8080
After the login screen, you'll see the Welcome to KeyCloak panel. Proceed to Administration Console

The login is:
Email:      admin
Password:   [KEYCLOAK_ADMIN_PASSWORD] #from docker-compose.yml
Once past the login, you will need to create a realm in Keycloak. Click on master and then select Create realm.
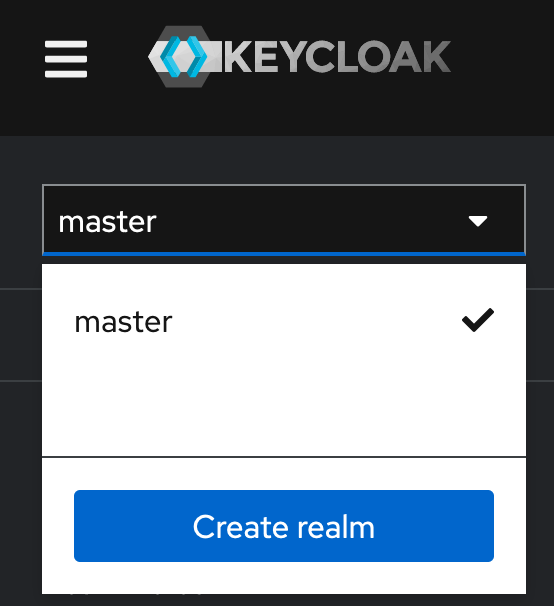
Don't worry about Resource file, in Realm name you will enter outline no caps, then select enabled to on. Then create the realm.
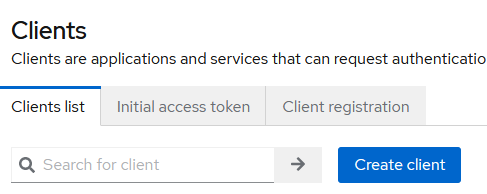
You should see a Welcome to outline page. Go to top left burger menu and select Clients, not Client Scopes.
Please continue with the button Create client.
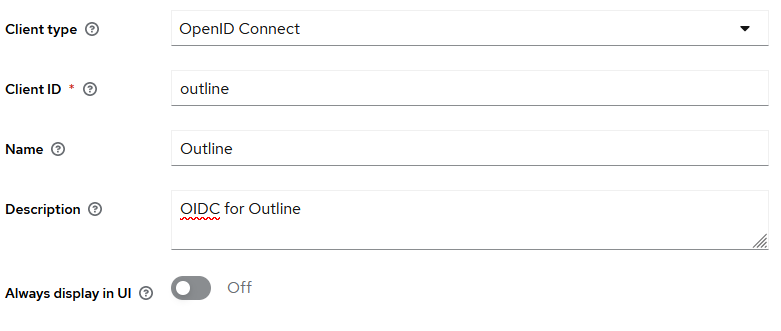
Make sure Client type is OpenID Connect, inside Client ID you're going to enter outline, no caps. You can fill out Name and Description if you like to. It will help if you have multiple services connecting to Keycloak going forward. Press the Next button.
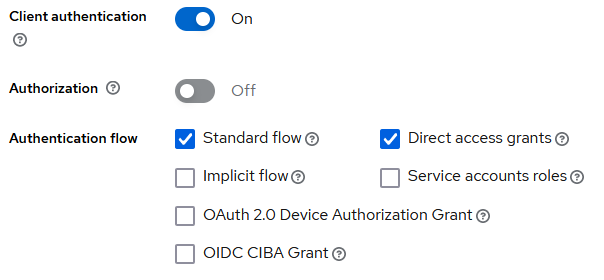
On the Next screen you will toggle on Client authentication and make sure that Standard flow is enabled, leave all other options as is. Proceed with the next button.
Root URL will be, again assuming you have a reverse proxy up, https://outline.domain.com/.
Home URL will be https://outline.domain.com/.
Valid redirect URIs will be https://outline.domain.com* make sure you have the *.
Do not fill in Valid post logout redirect URIs and Web Origins. Proceed to Save
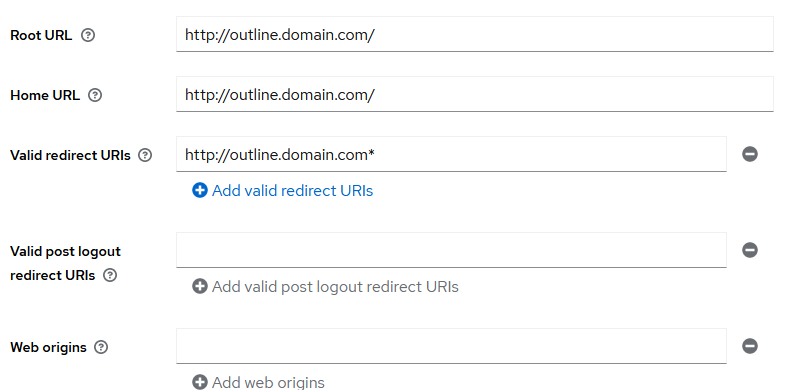
Once that's saved the page will reload and new tabs will appear. We are going to select the tab Credentials.
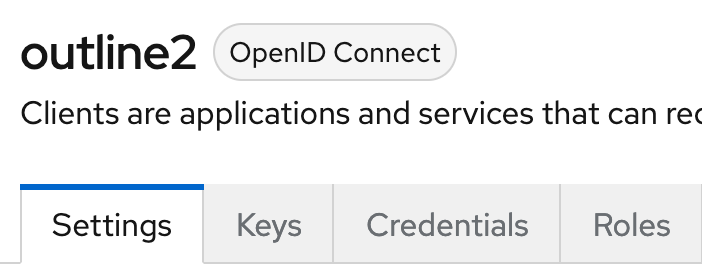
Copy Client Secret into the docker.env. The Secret we just copied will be pasted into OIDC_CLIENT_SECRET= env variable.

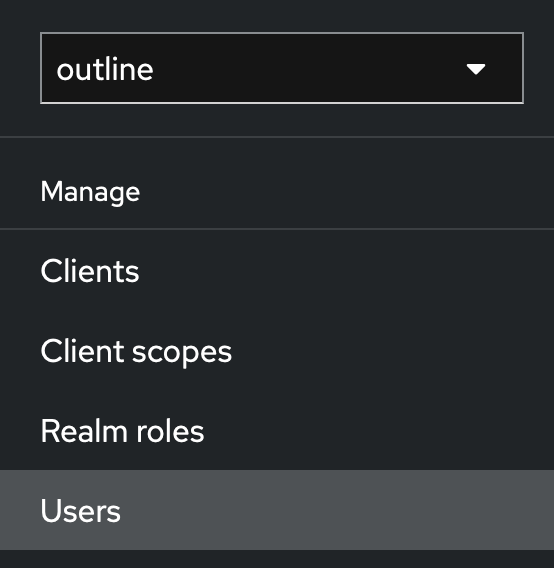
Next we are going to add a User or Users into the realm. Head to the side bar and locate Users, then select Add user.

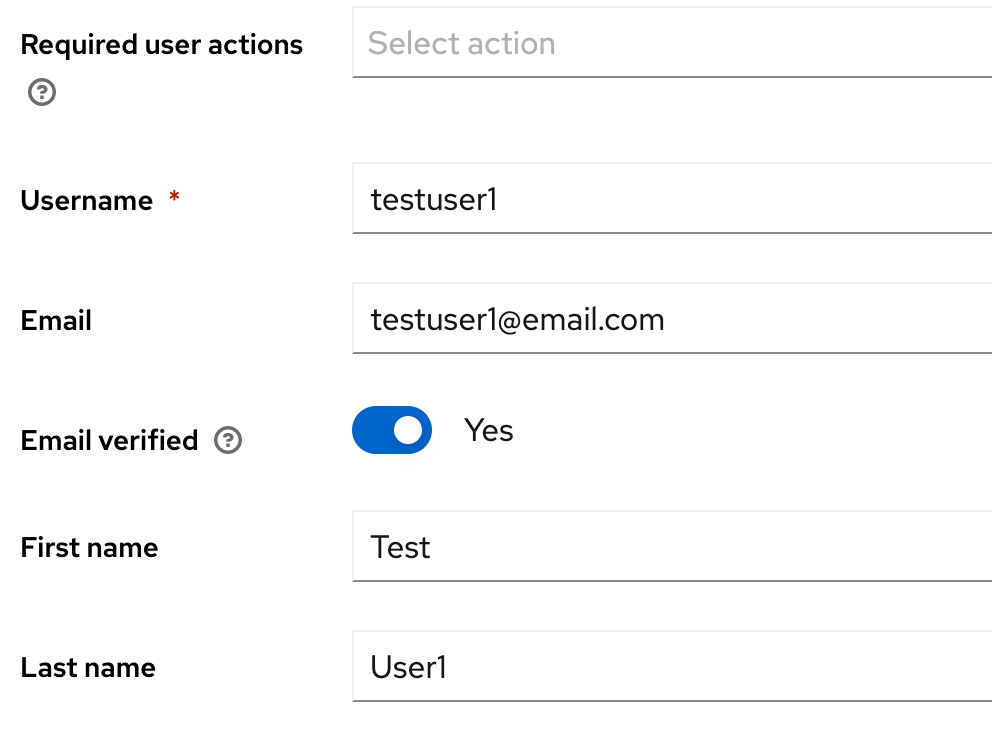
Filling in the following fields: Username, Email, First name and Last name. You will want to toggle on verified email for your 1st user or any user you know that has a vaild email address. Afterwords select Create user.
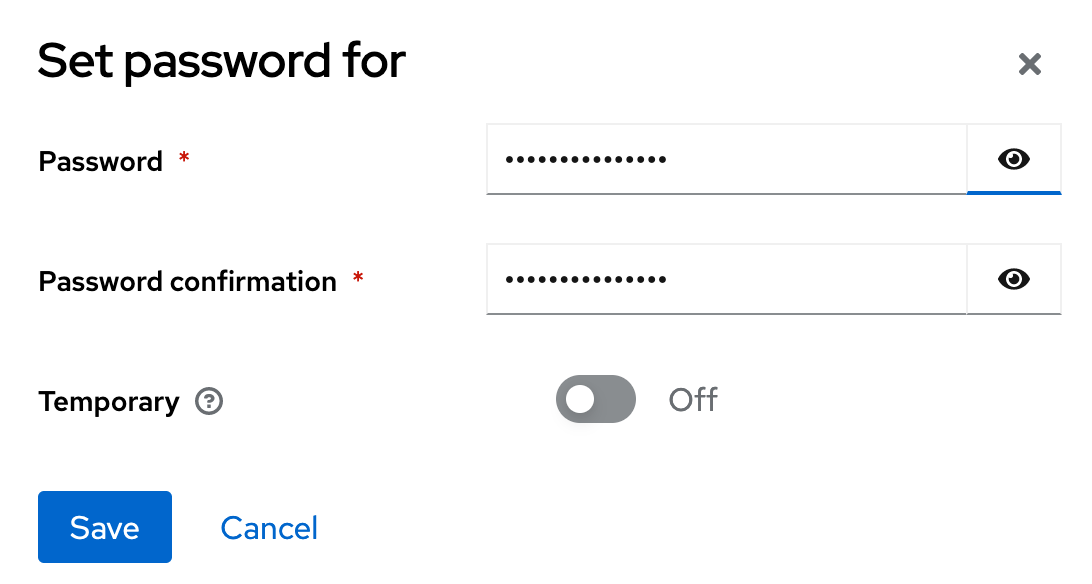
Once you've created the user new tabs will show up. Select Credentials to add a password to the user.

Set a password for your new user and toggle off Temporay, now save the password.
Optional if you want to you can at this point fill out the SMTP section of the docker.env file to set up transactional emails. Invites, password resets, view codes and notifications from outline are all transactional. I'm not going over that since SMTP settings can vary by provider.
shutdown your docker-outline-keycloak stack, exit everything gracefully.
Then bring your stack back up,docker compose up -d, this will make sure that outline see's the changes to the docker.env file.
Head to your outline instance in your web browser by going to https://outline.domain.com, login with the user you've just made and your good to go.
If you try to upload photos and are getting a failed message you will need to do the following command to the folder where outline is storing data.
chown 1001 /location/on/host/filesystem/outline-data
Thats it enjoy your selfhosted instance to Outline.
Notes
- For more documentation go to the Outline Official Docs
